Monday, March 9, 2015

The Benefits of Snow


I have to admit, living in a climate with snow (even if it feels like 6 months of the year) has it's advantages.  Last weekend my husband spent hours outside in freezing temperatures creating this snow fort out of the drifts left from the plow. At the time, I thought he was nuts. I can tolerate about 15 minutes of outside time in the winter. My daughter definitely takes after him.


He has fond memories of his childhood (growing up in the Catskill mountains) and many-a-winter crafting snow forts with his older brother.  His brother would carve these tunnels that were super unsafe and my husband was always the tester.  Apparently there were several occasions when they were not what an engineer would call 'structurally sound' and my husband was the one to discover this.

But this thing was incredible. A tunnel (reinforced with PVC tubes leftover from a project), 3 different slides, steps, and the top of our Christmas tree (don't ask).  My daughter just absolutely loved playing with her Daddy in the fort. She would have slept outside in it if her mittens hadn't betrayed her. Her last run concluded with, "OK, Dada. One more time, then cocoa."


I love that he took the time on a day off to create this. It teaches her so much to see him dedicate himself to a goal and not give up until it's finished. To see him go from an idea in his mind, to working to make it from scratch to being able to experience the finished project is so rewarding.  We watched out the window as he sculpted the snow a little at a time.  I hope she remembers this for a long time.  As you can see from the below video, she really enjoyed it.  Even if the plow did destroy it the very next day.

Playing in the Snow Fort


Sunday, February 22, 2015

Chomatography for 'I Am a Bunny"


Surprise!! It's still winter in New York.  I'm constantly racking my brain trying to think of activities that don't involve going outside in negative windchill weather.  The other day, the activity that my daughter came up with was, "Go to Trader Joe's for cheese crackers."  That one did involve leaving the house, but I went with it because I had no better ideas.

But today!  Today, I came up with something truly brilliant. Chromatography!!! Growing up, I had a neighbor who was pretty much the coolest guy you could live next door to.  He was a scientist who never had kids of his own and was basically like our own personal Bill Nye the Science Guy.  He would bring things over to our house that we never could have had access to on our own, like dry ice or chemical indicators for science experiments.  He was the reason I am fascinated by science and have a healthy appreciation for curiosity.  I want to continue to foster that in my daughter. This was one experiment that 'Bill Nye' showed us growing up that I thought would be good for another cold day.

Chromatography is the separation of a color or chemical into it's component parts. In our case, it was separating the ink of our markers into the various colors that make it up.  You will definitely have all of the materials on hand, it's fascinating for kids of all ages, and it can also be a lesson on color mixing and primary vs. secondary colors!

The pretty colors!!
We read the book I am a Bunny by Richard Scarry, which is another Goldenbook and a childhood classic.  It has gorgeous illustrations and is very colorful.  It goes through the life of a bunny in various seasons, so there are any number of activities that you could do with it.


What You'll Need:
  • Markers (not permanent) of various colors 
  • Small glasses with tap water
  • Toothpicks
  • Tape
  • Paper towel strips
A few notes: you want the water to just touch the bottom of the paper towel, so there are no measurements for this. (My black strip got a bit too watery).  Brown and black markers make the most dramatic separation on account of needing more colors to make them.

What to Do:

  1. Take your paper towel strip and hold it up to your small glasses. Estimate where to place the color and draw a solid line a little way up the towel. You want the bottom of the towel to touch the water line, but not touch the marker.
  2. Measuring where to place the line.
    Brown on the left, black on the right.

  1. Tape the towel onto the toothpick at the very top. 
  2. Gently lower the paper towel into the glass of water, balancing the toothpick so it doesn't fall all the way in.
  3. Then you sit, and observe.  You will notice the water crawl up the paper towel and you will begin to see it separate into it's component parts.  Ask the pupil to observe which new colors they see!
  4.  Watch until the water reaches all the way to the top of the paper.
    Brown has orange-ish brown, black and blue tones

    Notice how the primary color (red) does not separate.
    Black separates into orange black, brown and blue.
  5. Play around with lots of colors, or many on the same paper to really have some mixing. 
  6. Ooooh pretty!!
  7. Our finished pieces.
Have fun with this one. It's so scienc-y! (That's definitely a word) and is fun for kiddos of any age.

Tuesday, February 10, 2015

Be Mine, Valentine!


Valentine's Day is coming up, obvs., and I've noticed I enjoy holidays a lot more now that I have this little one to do my bidding.  No, but seriously, holidays really help break up the monotony that can come with being a stay-at-home parent.  It gives you a really good excuse to do something a little different and make the focus doing something for others.  For that reason, I decided to have my daughter help make some Valentines to send out to cousins and friends. I got the idea from an episode of Curious George (yes, George has a wealth of ideas).

There are about a million Valentine's Day themed books you can read for this activity. Or, any book about love or doing something nice for those you love would be perfect for this.  Here is a really sweet list of books from PBS to get you started: Children's Books That Say 'I Love You'


What You'll Need:


We went for the classic potato stamp activity here. If you've never done it before, it's really easy.  You probably already have everything you need at home.


  • A potato (any size)
  • A sharp knife (parents only for this part)
  • Something to mark your design (pen, pencil)
  • Paint (preferably washable)
  • An old plastic container for paint
  • Blank cards (I got the cardstock kind from Michael's -similar here)  
  • A willing assistant

Procedure:

  1. Start by cutting the potato in half across the equator.  Draw out your design and poke holes to trace the outline into the potato.
  2. Like so.
  3. Begin cutting out the design (carefully!) with your knife (adults only, please).  Cut all around and give yourself a bit of clearance so that the design is standing about an 1/8" from the base of the potato (that way you won't get the edges stamped as well). 
  4. Do the same thing with the other half so you have some variation. 
    Tada!  (The less complicated the design, the better)
  5. Grab a scrap/practice piece of paper and squirt some paint onto your plastic container.  Dry off the potato a bit (it helps the paint adhere better), and dip into the paint. You don't want a ton on there or it will not come out very clearly. A light coating is best.
  6. Stamp onto the paper to get a feel for how much paint you'll need.  Lift straight up and...voila! You just made yourself a potato print!
  7. The first one is definitely a bit iffy.  My daughter ended up making a blob, but who doesn't love a blob valentine? Keep stamping cards and let them dry completely before writing inside.


The stamped cards. The one on the left is a special one for Daddy.

It definitely turned into finger painting by the end.
I think family and friends are really going to love getting their definitely-handmade mail.  It's always so exciting for kids to get something addressed just to them!  I hope you enjoy this activity and let me know if you try it out!

Friday, February 6, 2015

The Very Hungry Caterpillar Nutrition Game


I'm 3 1/2 months pregnant with my second baby and, let's be honest, it's all about food for me right now. I can't stop eating everything I know is terrible for me. Fried food, sweets, etc.  My daughter is starting to pick up some bad habits when it comes to eating (she tends to eat pretty well, but has her go-to's that she wants at approximately every meal). I thought a lesson on nutrition might help me my 2 year-old-impressionable-daughter.

We started with The Very Hungry Caterpillar by Eric Carle.  If you've never read this book, you probably had a very sad childhood, or a parenthood that didn't involve reading this book a million times over and over again. I have to admit, it's not my favorite. But it does lend itself very well to some wonderful activities. Paper-cut crafts, the butterfly life cycle, and our lesson for today: nutrition!

The caterpillar grows big and strong by eating lots of fruits/leaves and then goes on a binge eating all of the things that I am currently craving.  Then he gets a stomach ache.  I used those pages to reinforce/introduce this activity.


What You'll Need:


  • Photos of food cut from those mailers you probably get all the time, magazines, or you can print some off of the internets.  (If you have older kiddos, they can do the scavenger hunting and cut them out for some scissor practice).
  • 2 plates- one for food that makes you big and strong (healthy food) and one for foods that give you a bellyache if you eat too much (junk food).
Procedure:

  1. Go through and identify the foods you've selected. You'll want a sampling of fruits, vegetables, meats, sweets, etc.
  2. Remind the kiddo how when the caterpillar ate good food, he got bigger and when he ate the junk food he got a stomach ache.
  3. Label (or explain) that one plate is for food that makes you get big and strong (or healthy foods) and one that would give you a belly ache if you eat too many (junk food).
  4. Help the kiddo place each food on the appropriate plate.
My daughter kept saying that the junk food is really yummy (she's not wrong!)

Our final tally.


This is obviously up to your judgement when it comes to healthfulness.  If they can justify why it's healthy (or junky) then I say go for it. We then went through the pictures and put everything we love to eat on one plate, just for fun. This was my daughter's. I sure do love that girl...


Thursday, February 5, 2015

The Mitten Activity


We've been wearing a lot of mittens lately.  Today was no different, and according to the groundhog, we should expect more of the same. I'm sure I'm not alone in this sentiment, but I like winter around Christmas-time and then I would like spring to be here by February.  Western New York has other plans, of course, so I figure I'd better embrace it for my daughter's sake. The Mitten by Jan Brett is a classic winter book (we have a board book version) with beautiful illustrations.  It's about a little boy named Nicki who would like a pair of mittens as white as the snow. His Baba knits him a pair with the warning that they can be easily lost in the snow. Of course, he loses one and a bevy of animals use it for shelter.  My favorite part of this book are the tiny illustrations along the sides of the pages that foreshadow what will happen on the next page (this is a great way to introduce this concept for little ones).

See the little side-bar illustrations? A badger is coming next!


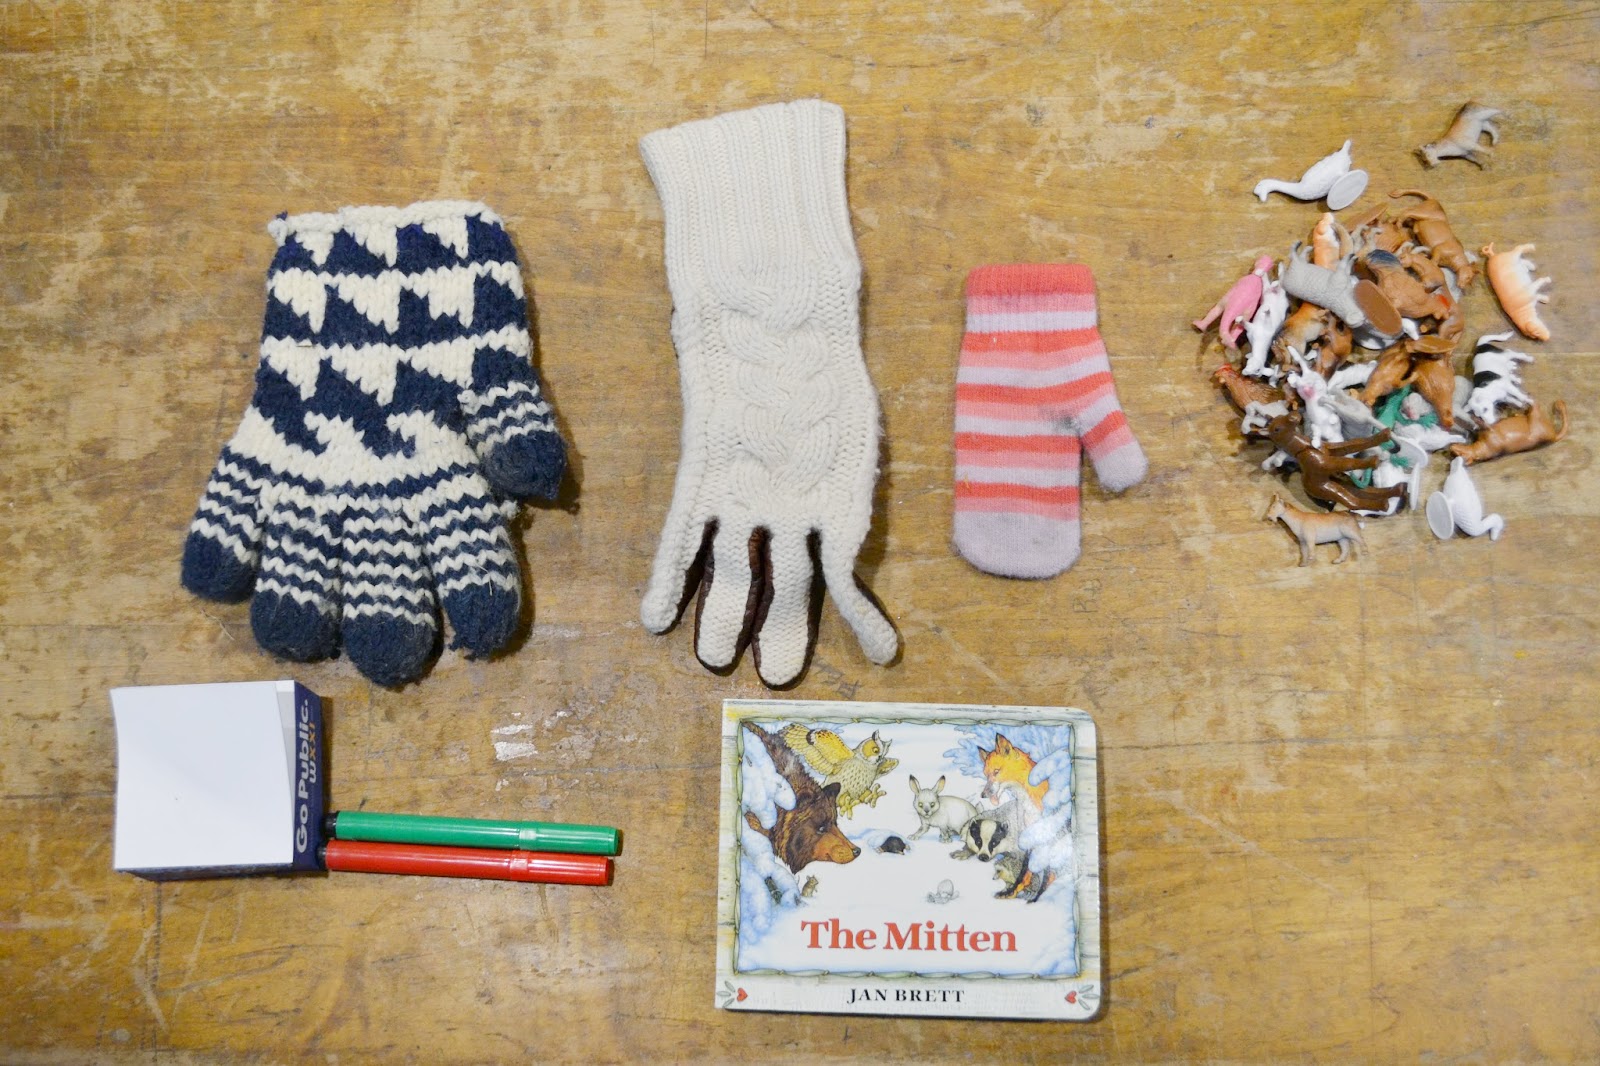
I decided to go a bit literal with this one again, but put a little math spin on it.  I found some mittens/gloves of various sizes and we took my daughter's little plastic animals and put as many as could fit inside each one.  I also decided to use this as a basic introduction to estimation.


What You'll Need:

  • Mittens/gloves of varying sizes
  • Paper to make your estimates/record final amount
  • A writing implement
  • Plastic animals
*Note: We used the plastic animals to go along with the story, but if you would really like to compare the volume of the mittens accurately, choose objects that are all the same size and shape (like Unifix cubes or marbles). This activity would be a great one for older kids, too who already have an understanding of estimation.


Procedure:

Estimating how many animals will fit and recording it.

  1. Remind the kiddo how lots of animals were able to fit into Nicki's mitten. Show them the chosen mittens and explain that you are going to see how many animals can fit into your mittens.
  2. Place a piece of paper below each mitten/glove and write the words Estimate: _____ and Actual: ________
  3. Begin by looking at each mitten and give them a stretch.  Ask the child how many animals they think might fit into the glove/mitten. (My daughter is 2 and made some adorable guesses, but write down any guess they make and explain that you're making your best guess as to how many might fit, but it's okay if you don't guess correctly).
  4. Begin putting animals in the first mitten and count out loud.  Fit as many in as you can and record the total under Actual: _______. Remove the animals (unless you have enough items to fill each glove full) and move on to the second glove/mitten.
  5. Continue this process until every mitten/glove has been filled with animals and record your amounts. 
  6. Examine your records and see how close your estimations were. With older children, they can find the difference between the estimate and actual (Subtract the higher number from the lower number and record the finding) or state if their estimates were greater or less than the actual.


Gloves/mittens can definitely stretch quite a bit, so use your judgement to determine when it is 'full.'  Have fun and then go play outside in the snow! 


Tuesday, February 3, 2015

In The Night Kitchen


We just got hit with a big storm yesterday. I of course, had a dentist's appointment scheduled for my daughter for that morning and decided to venture out rather than reschedule. Not the best idea I've ever had. But, we made it safe and sound, picked up a few essentials at the store, and hunkered down for a day inside.

By today, I was finally ready to put some effort into a fun activity and maybe even take the kiddo out into the snow. I chose another childhood favorite, In The Night Kitchen by Maurice Sendak.  It's a very visual book that's laid out in sort of a graphic novel way with very little text on each page and wonderful illustrations.  My daughter loved it and wanted to read it twice (as per usual), and was especially tickled with the 'sound words.'
Take note of the Caldecott medal on the front cover.

The graphic novel-esque layout and the inspiration page for our activity.
The activity I planned was also one that we did as children and I couldn't wait to introduce the process to my daughter. I consulted with my mother on the recipe (it was one she always made from memory) and found a recipe on Pinterest that was very close to hers.  The hands-on, sticky and delicious recipe I decided to do is for from-scratch Monkey Bread! If you've never had it, it's the perfect recipe for kids to make because they love rolling the dough in butter and cinnamon-sugar and what could be better than pulling individual pieces of ooey-gooey warm sweet bread with your fingers? It's definitely worth the effort.

The recipe I used takes about 1 1/2 of rise-time, so it's a bit of a commitment, but perfect for a snowy winter's day. You are supposed to use a bundt pan to keep the pieces contained, but ours is currently in storage, so a regular old pan works almost as well.  Ignore the fact that the kitchen is definitely not presentable for company, please. :)

Mixing the eggs into the yeast mixture

What You'll Need:

(Recipe from Bon Appetit) 

Ingredients

2/3 cup whole milk
5 tablespoons sugar, divided
1 3/4 teaspoons active dry yeast (from one 1/4-ounce envelope)
2 large eggs, room temperature
2 3/4 cups unbleached all-purpose flour
1 teaspoon kosher salt
1/2 cup (1 stick) unsalted butter, cut into 1-inch pieces, room temperature, plus 1/2 tablespoon, melted


Preparation
Stand Mixer Method
Heat milk in a small saucepan over medium heat or in a microwave until an instant-read thermometer registers 110°–115°. Transfer milk to a 2-cup measuring cup; stir in 1 Tbsp. sugar. Sprinkle yeast over milk and whisk to blend. Let sit until yeast is foamy, about 5 minutes. Add eggs; whisk until smooth.
Combine remaining 4 Tbsp. sugar, flour, and salt in the bowl of a stand mixer fitted with a dough hook. (If making Vanilla Cloverleaf Sweet Rolls, scrape in seeds from vanilla bean. If making Apricot-Anise Tarts, add aniseed.) Add milk mixture. With mixer running, add 1/2 cup room-temperature butter, 1 piece at a time, blending well between additions. Mix on medium speed for 1 minute. Knead on medium-high speed until dough is soft and silky, about 5 minutes.
Brush a medium bowl with some melted butter; place dough in bowl. Brush top of dough with remaining melted butter; cover with plastic wrap. DO AHEAD: Can be made 1 day ahead. Cover with plastic; chill.
Let dough rise in a warm, draft-free area until doubled in size, 1–1 1/2 hours (or 2–2 1/2 hours if dough has been refrigerated).


The Process

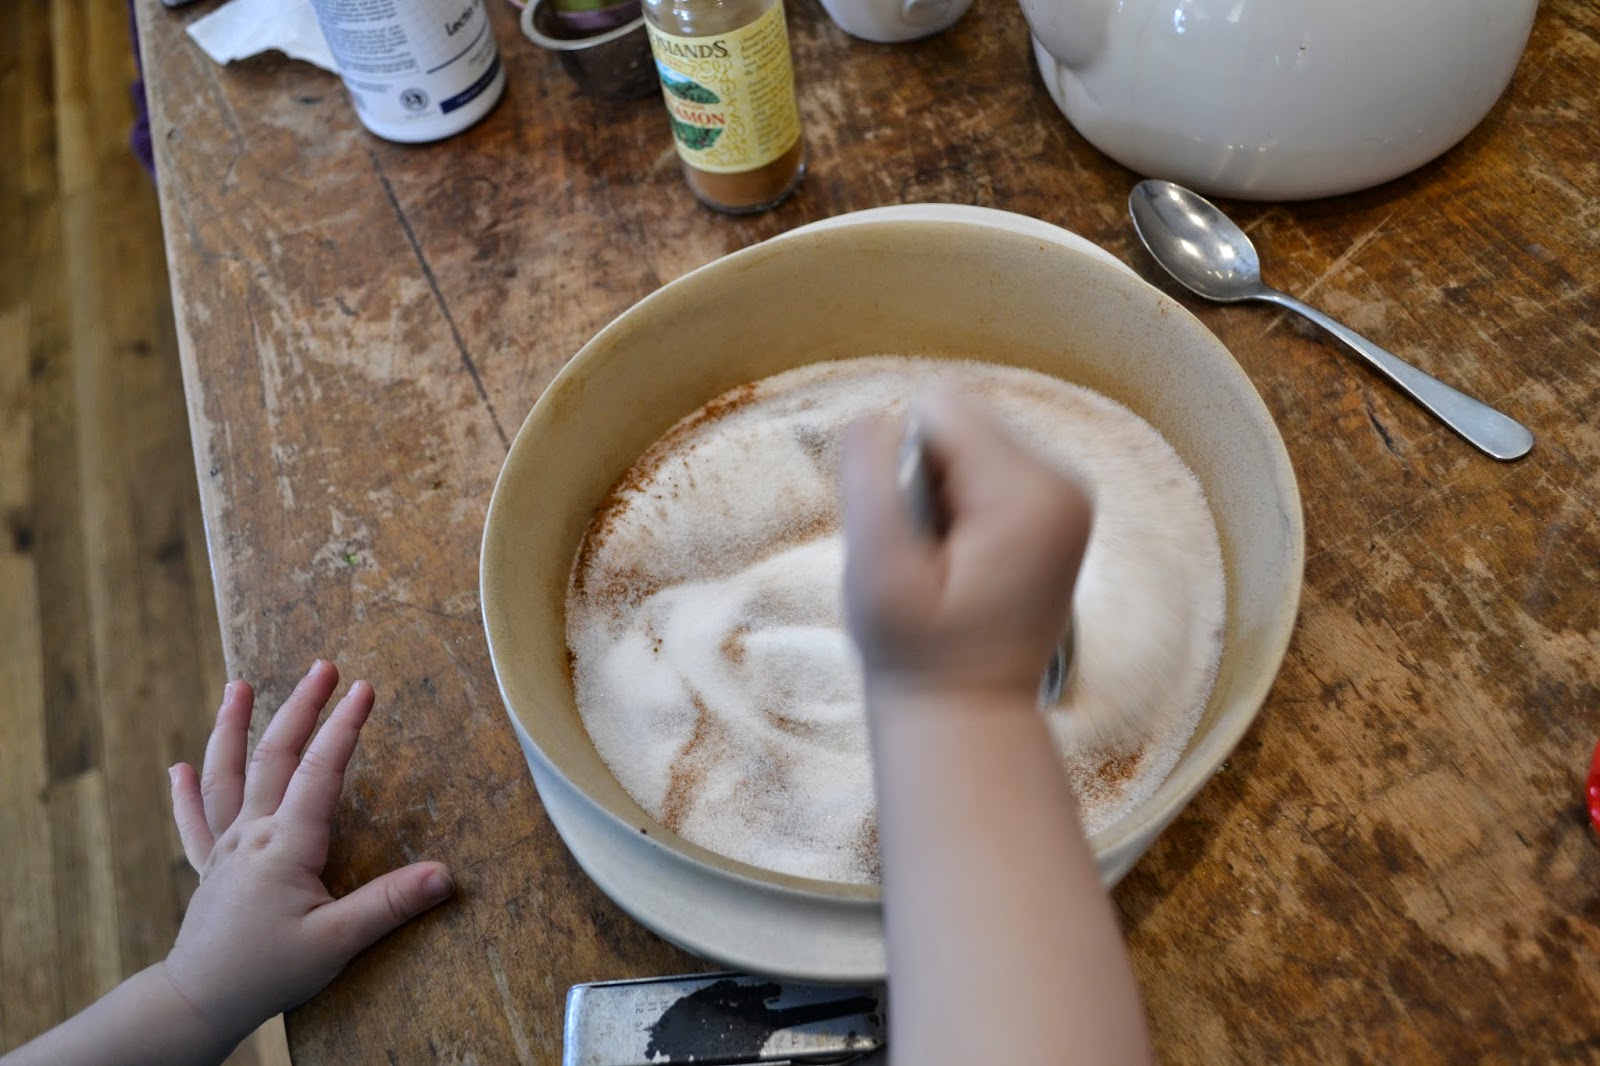
Once the dough has risen, you break off little balls, roll them in a stick of melted butter, then a cinnamon-sugar mixture and place it in your baking dish.  This is the fun/messy part for kids. Preheat your oven to 350 degrees F, let the dough rise again while the oven is preheating and pop it in the oven for 30-35 minutes or until golden brown.  Let it cool on the stove for about 10 minutes, then you can flip it out of the plan onto a serving platter, or a cookie sheet covered with aluminum foil for easy clean-up!


As you can see, I just placed them in a ring shape inside my baking pan,
but you can use a bundt pan to make it even easier.
Then you get to eat! My daughter called it Mickey Monkey Dough (Mickey is the little boy from the book) and, of course, enjoyed eating the bread the most! Have so much fun and let me know what you think of this recipe, if you try it!


Friday, January 30, 2015

The Paper Bag Princess


I'll admit it. I was looking for any excuse I could find to work this book into my reading rotation. It's called The Paper Bag Princess written by Robert Munsch.  It's the story of your not-so-typical princess who gets her castle destroyed by a dragon. She uses her smarts to trick the dragon and save her prince.  But there is a really fun twist at the end that I don't want to spoil for you.  Grab this book and enjoy coming up with voices for the dragon.


Activity:  The Paper Bag Dress


This connection is a bit obvious, but it allows for lots of creativity and you can really go anywhere with this project. (Think a suit of armor for a little guy or a dragon outfit!)

What You'll Need:

  • A Paper Bag (thanks Trader Joe's!)
  • Scissors (for adult to use)
  • Something to mark with
  • Tape
  • Markers or paint
  • Stickers, sequins, glue, glitter, ribbon, etc. etc.!


Procedure:

  1. After finishing the book, ask the kiddo what Elizabeth (the princess) had to wear after her castle was burned down.  Ask if they would like to make their own outfit to wear.
  2. Gather materials (get creative with the decorative stuff).
  3. Begin by asking where the hole for the head should go.  Adult draws a space for the head and cuts it out.  
    I did 2 scoops on each side and connected them with a straight line.
  4. Try on the bag to make sure the placement is correct. Then, estimate where the arm holes should go and mark it with a marker.

5.  Cut out the arm holes and get to decorating!  We used markers, ribbon, tape, stickers and an old          shoe clip I wore on my wedding day!

6. Make a crown from the left-over pieces (we secured the crown with 2 bobby pins) or you could           make one that actually fits with construction paper.
7. Model your new fashion statement.  
And with the crown. That lasted all of 2 mins.

This is my daughter's 'cheese' face. I get it in a lot of pictures.


If you have an older kiddo who loves math, another activity you could do is a math equation to go along with the part of the story where the dragon flies around the world in 10 seconds. 

The formula is Speed = Distance/Time.  So, you know Time (10 seconds) and you can look up the circumference of the Earth (24,901 miles {40,075 km}) and figure out how fast the dragon was travelling! 

There are calculators online where your student could plug in the values and get the answer, too (promoting independence and computer literacy).  Here's one of those calculators: Speed Calculator


Have fun! If  you try out this activity, or read the book for the first time, I'd love to know what you thought!